

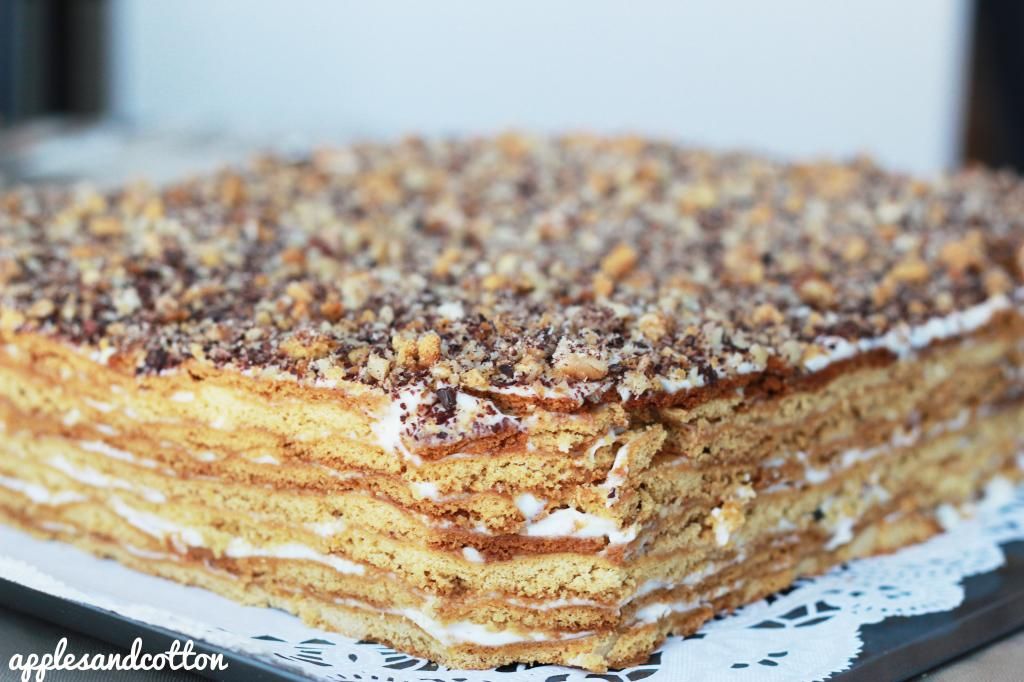
It was my sisters 29th birthday party and, like always, I was trying to think of what I can bake to bring to the party. My number one place to look for ideas is Pinterest! As I was looking through desserts I thought about making a delicious traditional Russian cake and right away the"Honey Cake" popped into my mind. It's easy to make but requires a lot of time. The Russian Honey cake is a very popular cake in Russia and is used in any special event. It has a very sweet and sour taste to it that always hits the inner sweet spot inside. It does take time to make but is so worth it in the end. Many people make this cake in different ways and it always turns out great. Some people add dulce de luche in-between the layers while others add sour cream and sugar. Some people add many layers while others just add a handful. Play around with the recipe and try to make it your own. You can add fruit or nuts to it or nothing at all.
Ingredients:
For my cake I made a double batch so if you are serving for a large group of people just make two batches so that you will have many layers. I used all organic ingredients.
- 9 egg yolks
- 1/2 cup cane sugar
- 8 tablespoons butter
- 1/2 cup raw honey
- 1.5 tsp baking soda
- 3 3/4 cups all purpose flour
- 2 -16oz sour cream
- 1.5 cups cane sugar
In your electric mixer, mix the egg yokes and sugar together for about 10 minutes. While that is mixing I usually prepare everything else.
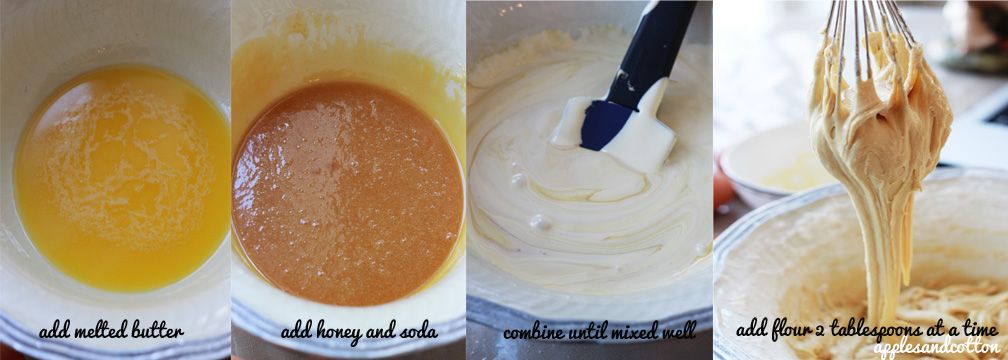
Take the butter and melt it in a small saucepan. After you melt it, put it in a medium size bowl and make sure to cover the sides with the melted butter as well. (Picture 1 above).
Next melt the honey in a small pot, on medium heat, and when it starts to boil add the baking soda to it. Keep mixing. Mix for only 10-15 seconds. It will start to bubble up. Do not over cook it. It should be a light color and not dark orange. After 5 seconds pour the honey mixture into the butter. (Picture 2).
Then add the egg and sugar mixture that was mixing in your electric mixer to the bowl. Mix until combined as shown above.
Add the flour 2-3 tablespoons at a time with a whisk. I had to change to a wooden spoon towards the end of my mixing because the dough will get sticky and thick.
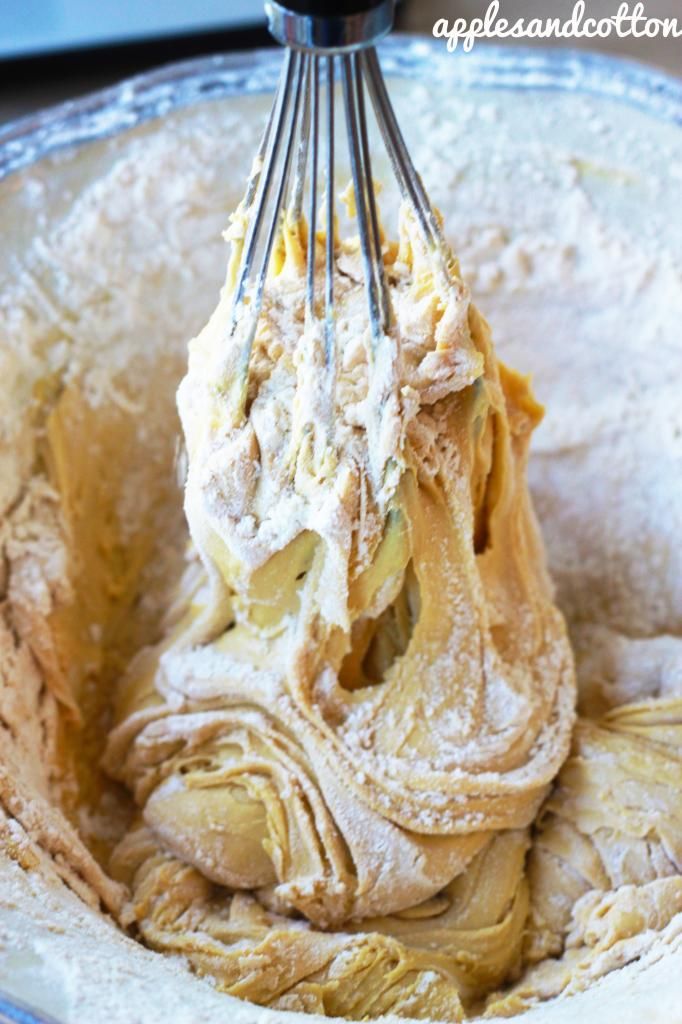
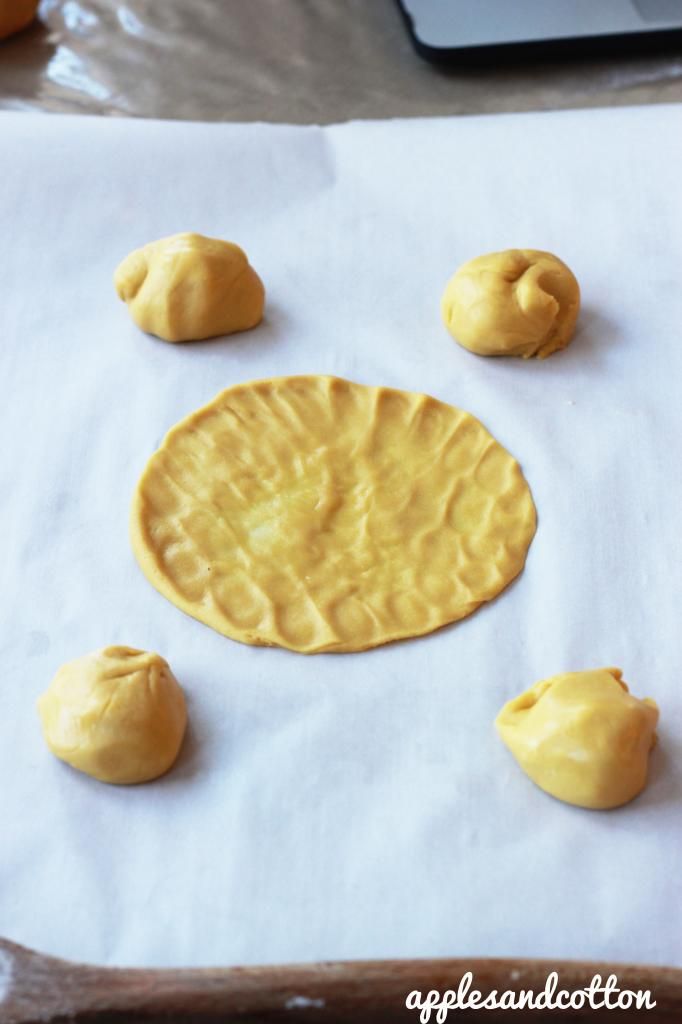
After that take your lump of dough from the bowl and put it down on your work area. Split the dough into four dough balls. I doubled my portions so that is why you see more than four dough balls. I smeared the dough balls with butter to make it easier to work with.
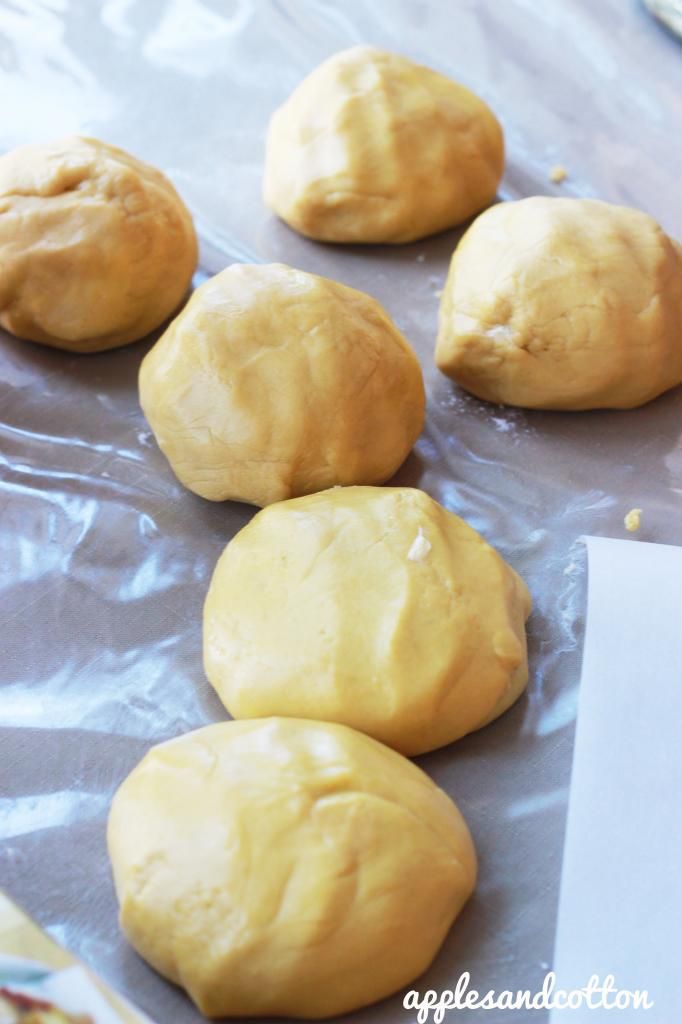
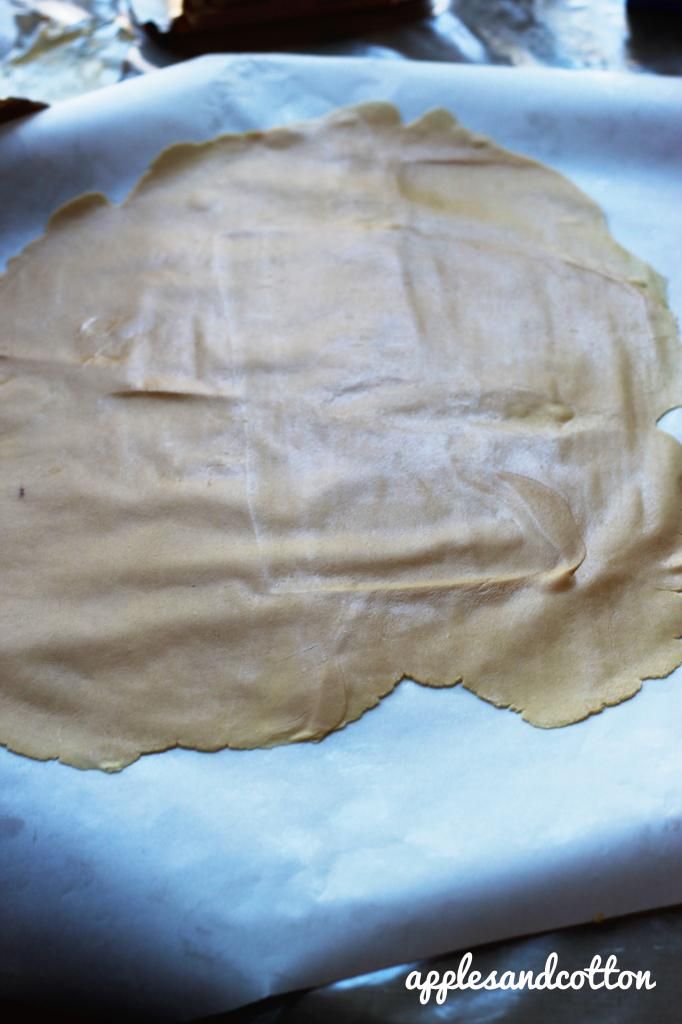
There are two ways to roll out the balls. The first is to use your fingers. See below. Take parchment paper and rip it into a good size to fit your cookie sheet pan. Take one of your four dough balls and split it again into five smaller dough balls. As shown below. Now with your fingers spread the balls out into a rectangular shape. I started the first ball in the middle and did a circular shape and then the rest of the dough formed the rectangular shape. Make sure to butter your fingers when you are spreading the dough. This will prevent the dough from sticking.
This is what it will look like after you have finished spreading it with your fingers.
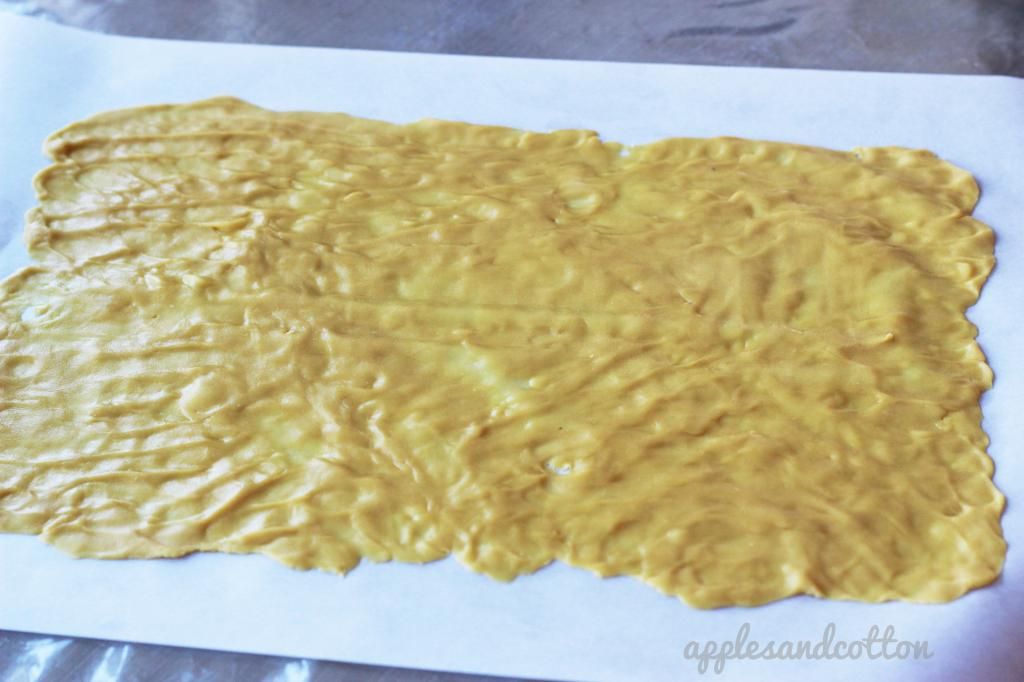
Make sure it is nice and flat. This process does take a long time to get all of the dough balls smeared out. When I was making a double batch my fingers got really tired so I rolled out the last dough balls with a roller.
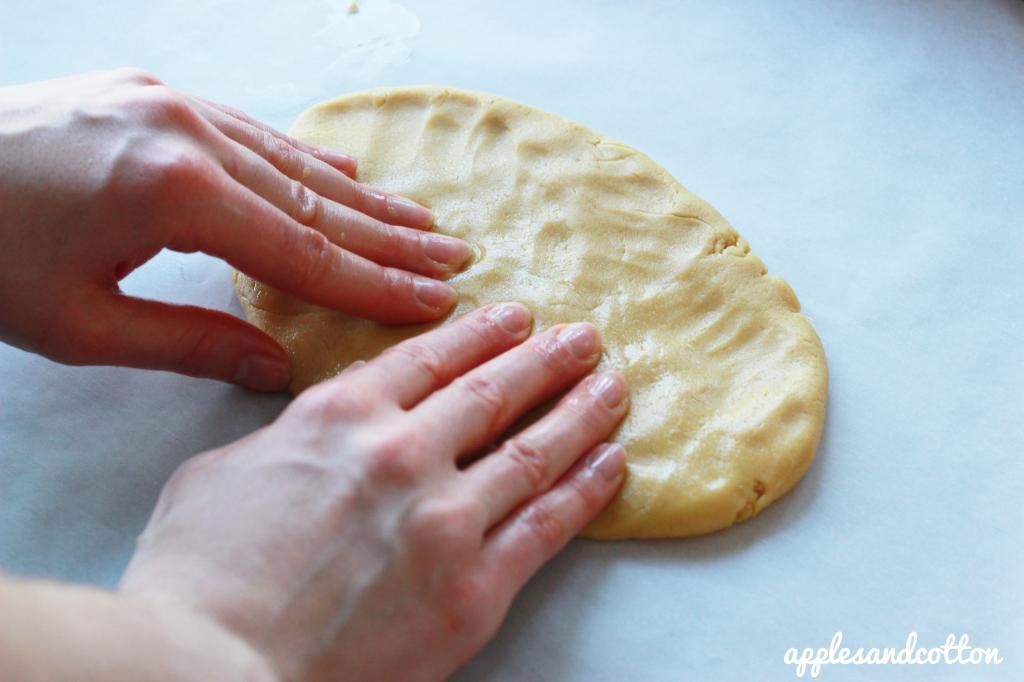
Form the dough ball into a rectangular shape. This process will help with rolling the dough ball out. Make sure to butter your rolling pin so it will not stick.
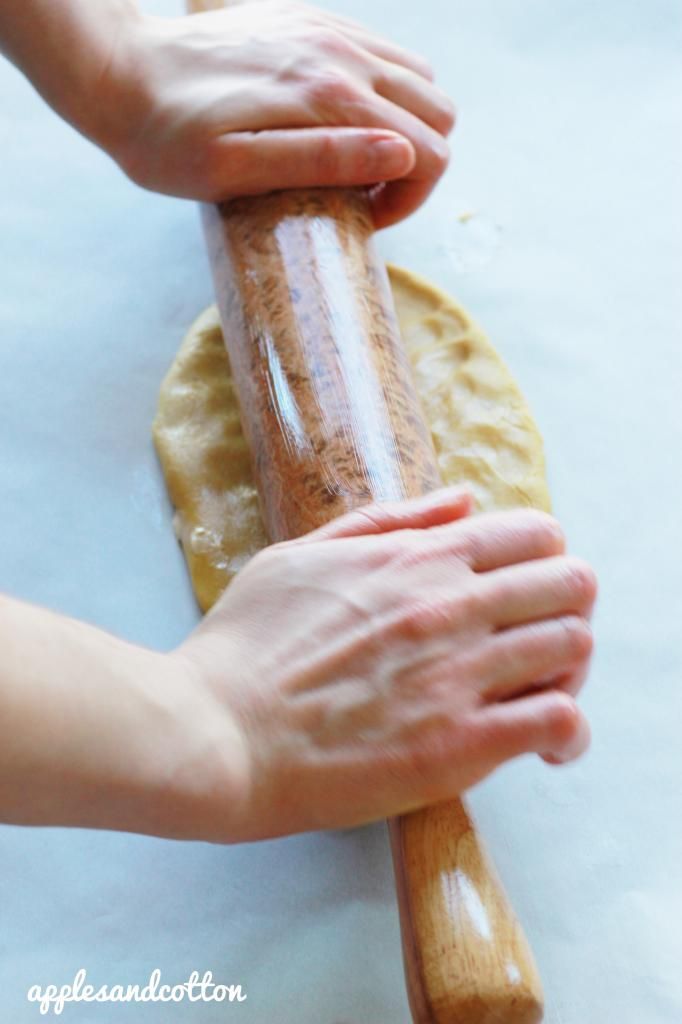
Press down and roll from top to bottom and then side to side. Doing it this way is a lot easier but the layers will not have that textured look to them.
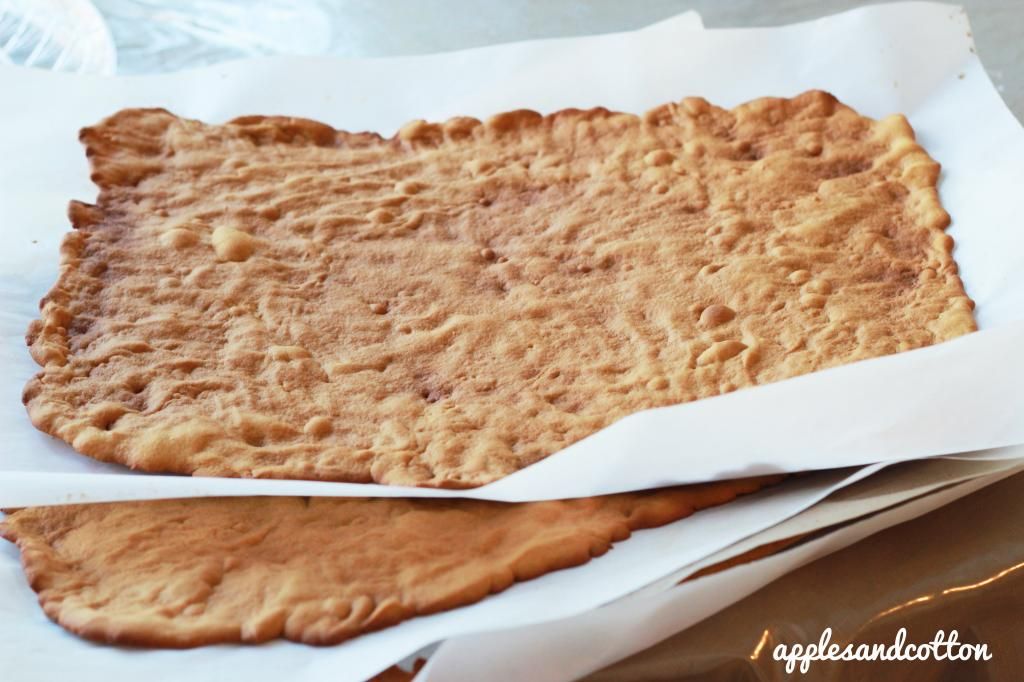
Bake for 5 minutes on 400 degrees. This is what the layers look like after you bake them in the oven. This is what it looks like when you use your fingers to spread out the dough.
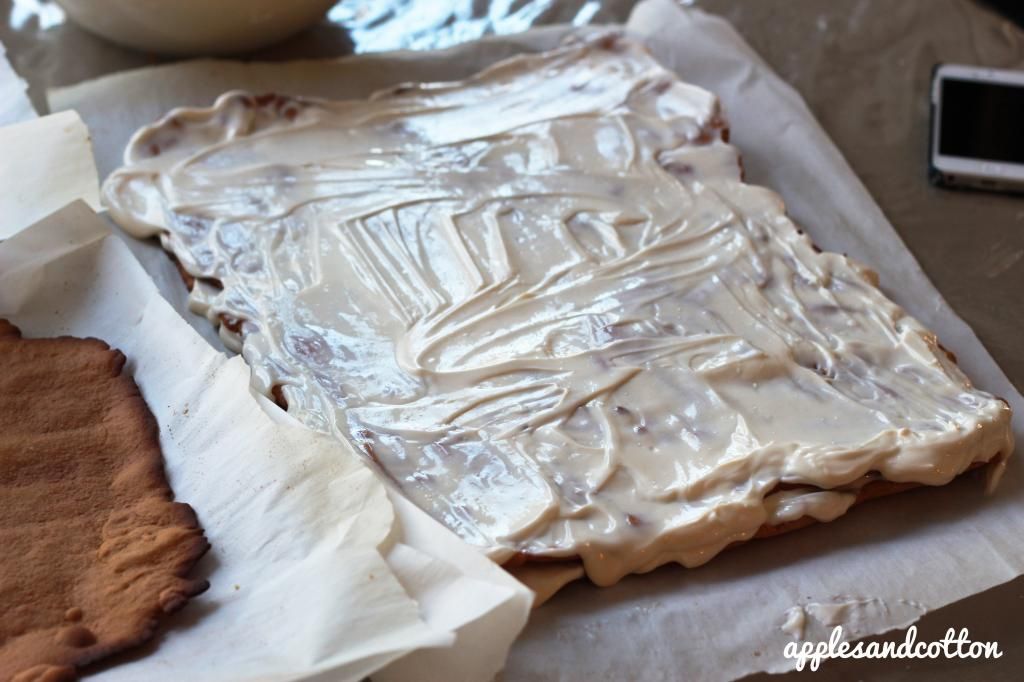
Now let all the layers cool down and then start to spread your cream in between the layers. Start with the bottom and add a little cream. Add next layer. Keep going until there are no more layers left.
Cut the sides of the cake to make it look presentable and add chocolate shavings, nuts, etc... to the top of the cake.
1 comment:
Really liked your Russian honey cake. Going to try all of them with the help of baking classes in Chennai.
Post a Comment